
You can track the traffic from your campaign to your own website.
This makes it easy to see the visits or orders, that are generated by your campaign.
To enable tracking to your own website, you need to insert a small (invisible) tracking pixel on your site.
Find your tracking pixel code under 'Campaign settings':
Navigate to 'Goal tracking' in the left hand menu and find your tracking code in the grey box:
![]()
Insert the tracking code on the pages on your own site, where you want to track traffic to. It might be easiest to insert it in the header or footer of the site, to have in included on all pages.
Now you will be able to see the visits from the campaign to the pages on your site, where you've placed the tracking code. You can assign a default value to each visit if you know how much a visit is worth for you.
If you want to assign specific values to specific pages, you can. If you have an ordering flow, you can assign a value to the confirmation page, to count orders or conversions.
To set this up, you need to visit the pages you want to track individually. This will trigger the tracking pixel and register each page. Go to your site and load the relevant pages in your browser.
Then come back to the 'Goal tracking' page.
Now you can choose the pages to track individually under 'Single goal pages'.
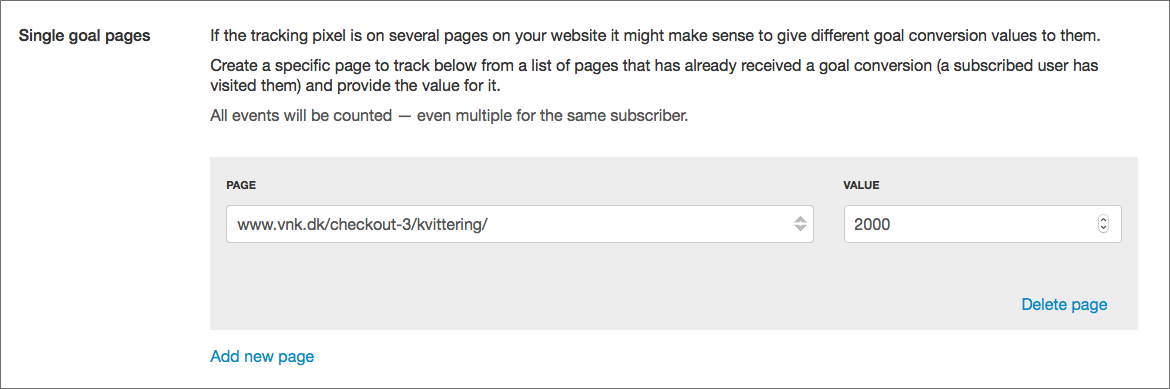
Here we have assigned a value of 2.000 to each visit from the campaign to the order confirmation page.
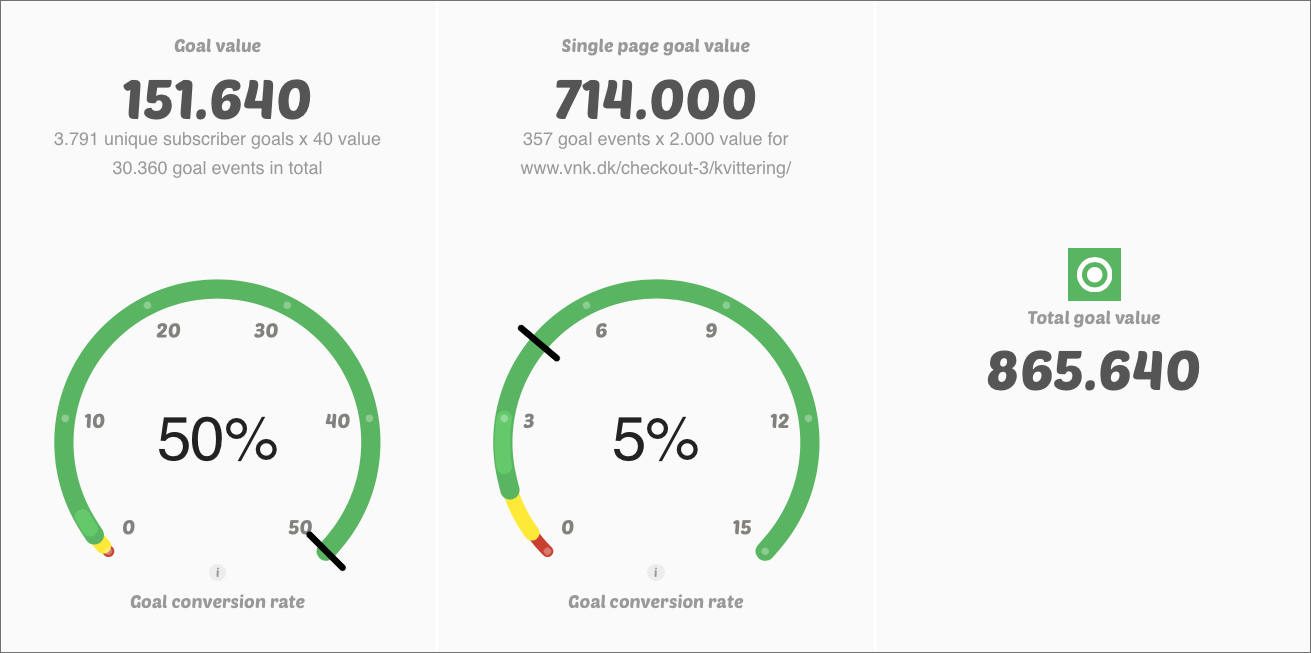
In the statistics page, you can follow your conversions:
0 Comments